Pre-registration of data for Mac terminals
This section describes how to pre-register your Mac device to use Mac Login.
About paid plans
This function is for paid plans (Premium).
Please purchase a plan when using this service.
Pre-registration for Mac devices
To use Mac login, you must register the information of the Mac device to be used from the web management console in advance. Please be sure to register this information in advance, as it will be needed later when setting up the client tools.
Download CSV file for registration
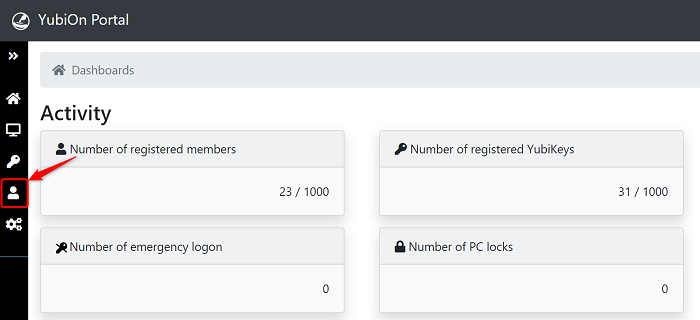
From the menu on the left side of the screen, click the “Users” icon.
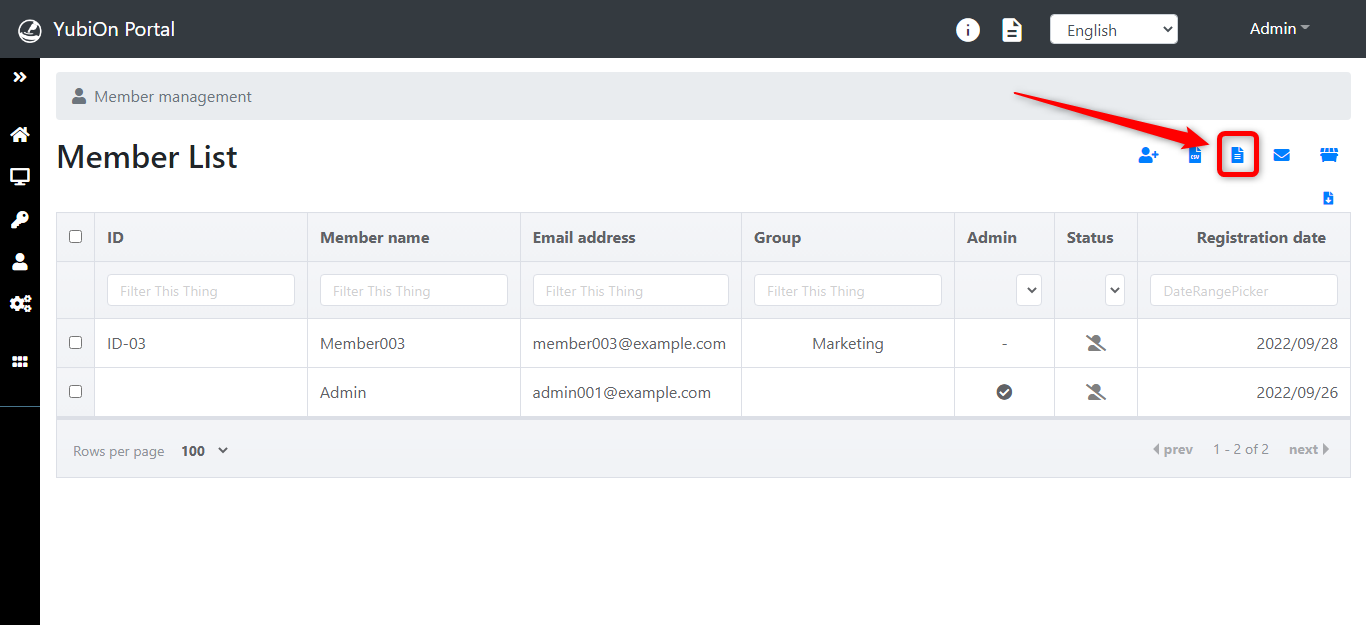
Click the “Kitting CSV registration” button on the right side of the Member management screen.
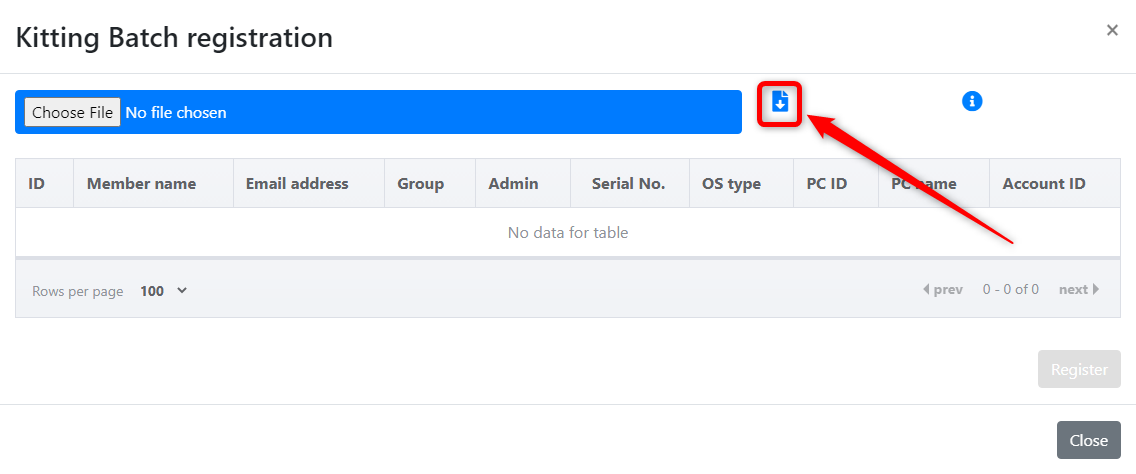
Click the “Download CSV sample file” button.
Save the file in any location.
CSV input
Open the downloaded “member_machine_registration_sample.csv”.
Below is a preview of the Excel file.

View in Excel
Enter registration information referring to the CSV file format below.
When the registration is complete, please save the file.
About the CSV file format
If opened in a text editor, it will be separated by a comma.
1st (column A) to 5th (column E) is member (user) information, 6th (column F) is YubiKey information, 7th (column G) to 10th (column J) is PC information.
You can use YubiOn Portal’s two-factor authentication service by associating the member (user) with the required YubiKey and PC information.
1st (column A): Enter ID
The “ID” is an item to facilitate sorting and filtering. Please use this field by setting an employee number, etc. (Half-width alphanumeric characters and hyphen “-”, underscore “_“, optional)
2nd (column B): Enter member names [Required]
Enter the user’s name in Japanese or alphanumeric characters.
3rd (column C): Enter your email address [Required]
Enter the user’s email address is standard email address format.
4th (column D): Enter group name.
Enter the name of the group of which you want to be a member. (Japanese, alphanumeric symbols, optional)
The group function assigns users (members) to groups. It is used to divide and filter users into groups such as sales and development.
5th (column E): Enter numbers to specify the user’s role [Required]
0: General (will only be granted access to the management site)
1: Administrators (can access, register, delete, edit, etc., on the administration site)
6th (column F): Enter the YubiKey’s serial number [Required]
Enter the “Serial Number” on the back of the YubiKey. (a half-width number)
7th (column G): Enter the OS type of the PC [Required]
Enter “Windows” or “macOS”*.
*macOS is only available for the paid version. Please contact us for availability.
8th (column H): Enter PC identification ID [Required]
Enter the SID or UUID of the PC.
How to obtain a PC identification ID
-
Windows
Execute the following command at the command prompt
Change the name part ("administrator" in the example below) to any value and execute.Get-WmiObject -class win32_useraccount | select name, SID, LocalAccount | where { $_.name -match "administrator" } | where { $_.LocalAccount } name SID LocalAccount ---- --- ------------ Administrator S-0-0-00-000000000-000000000-000000001-1000 True -
macOS
Execute the following commands in a terminal.
system_profiler SPHardwareDataType

Hardware:

    Hardware Overview:

    Model Name: XXXXXXX
      Model Identifier: XXXXXXX
      Chip: XXXXXXX
      Total XXXXXXX
      Memory: XXXXXXX
      System Firmware Version: XXXXXXX
      OS Loader Version: XXXXXXX
      Serial Number (system): XXXXXXX
      Hardware UUID: uuuuuuuu-uuuu-iiii-dddd-dddddddd
      Provisioning UDID: XXXXXXX
      Activation Lock Status: XXXXXXX
9th (column I): Enter a PC name [Required]
Enter a Windows or macOS PC name. (alphanumeric characters)
10th (column J): Enter an account name [Required]
Enter your Windows or macOS account name. (alphanumeric characters)
Regarding registering an AD account
Enter the “Short-domain name\account name”.
e.g. “demo.example.com” case
demo\accountName
If you have the same email address registered
If the same email address is input in the CSV more than once, or if you input a previously registered email address, the PC, account and YubiKey will be assigned to the same member.
CSV batch registration
Login to the YubiOn Portal site.
Click the “Users” icon from the menu on the left side of the screen.

Click the “kitting CSV registration” button on the right side of the member management screen.

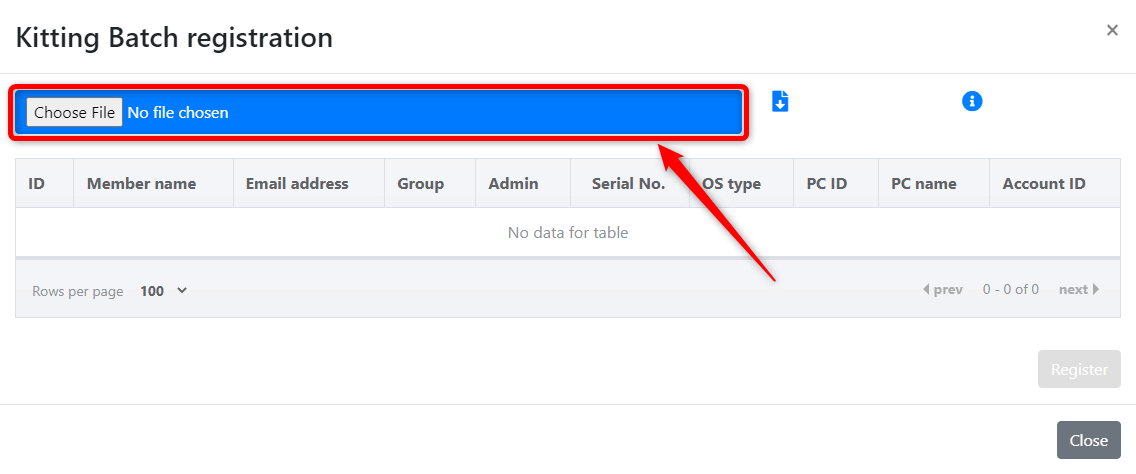
Click on “Choose File”.
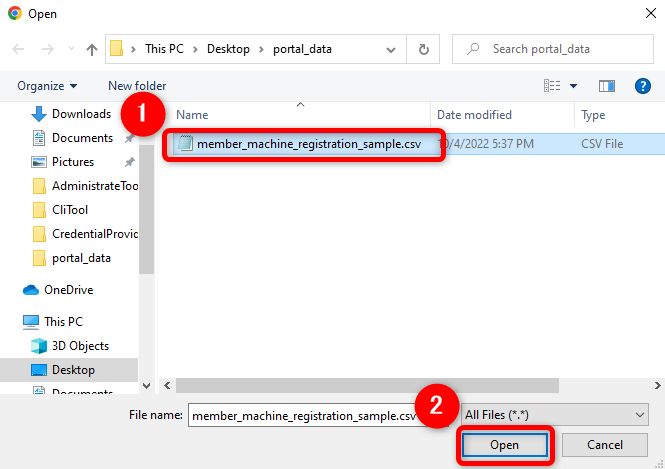
Click on the “member_machine_registration_sample.csv” file and click the “Open” button.
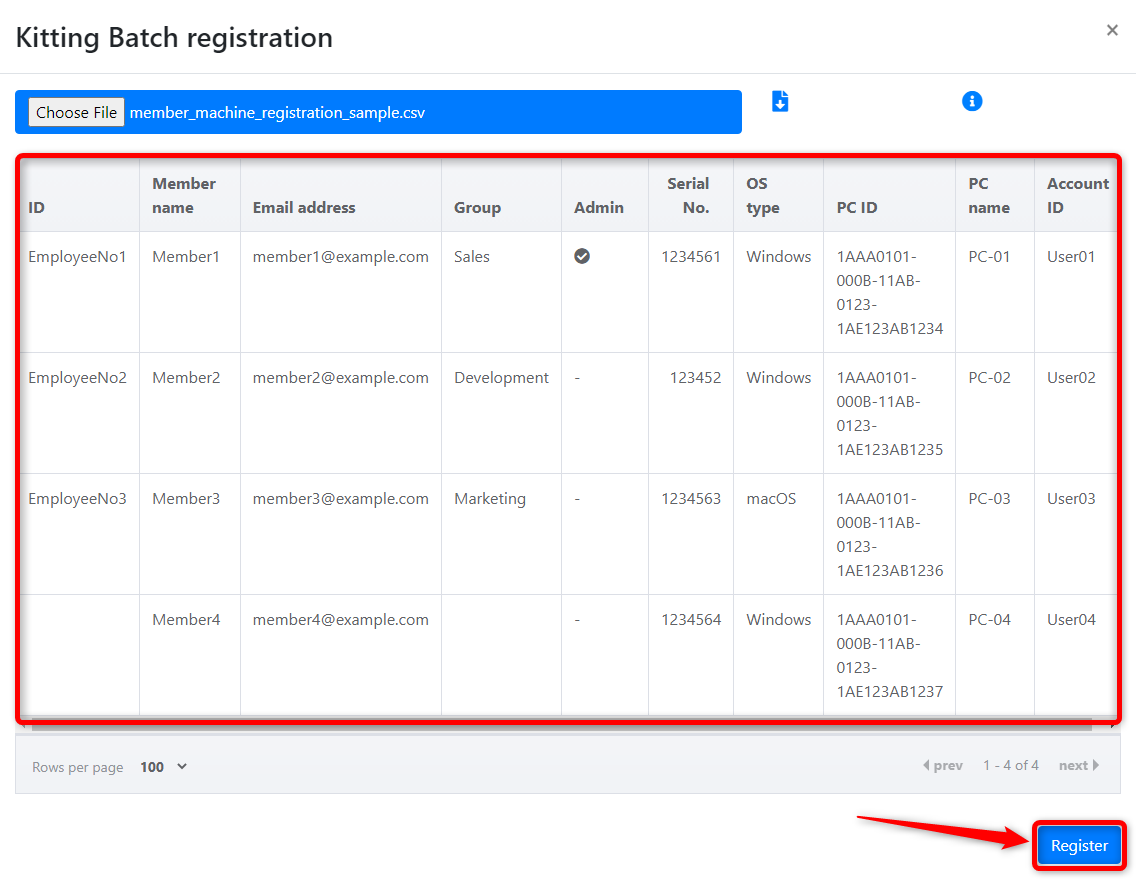
Confirm that the values displayed in the registration list are correct and click the “Register” button.
- Full-width character strings are not entered in half-width alphanumeric notation.
- No unnecessary spaces, character strings, etc. are entered.
- Email address format is correct.
- Admin column* is populated with numbers.
(*) If you are registered as an administrator, the administrator column will display a “check mark”.
If you are registered as a general, the administrator column will be marked with a “-”.
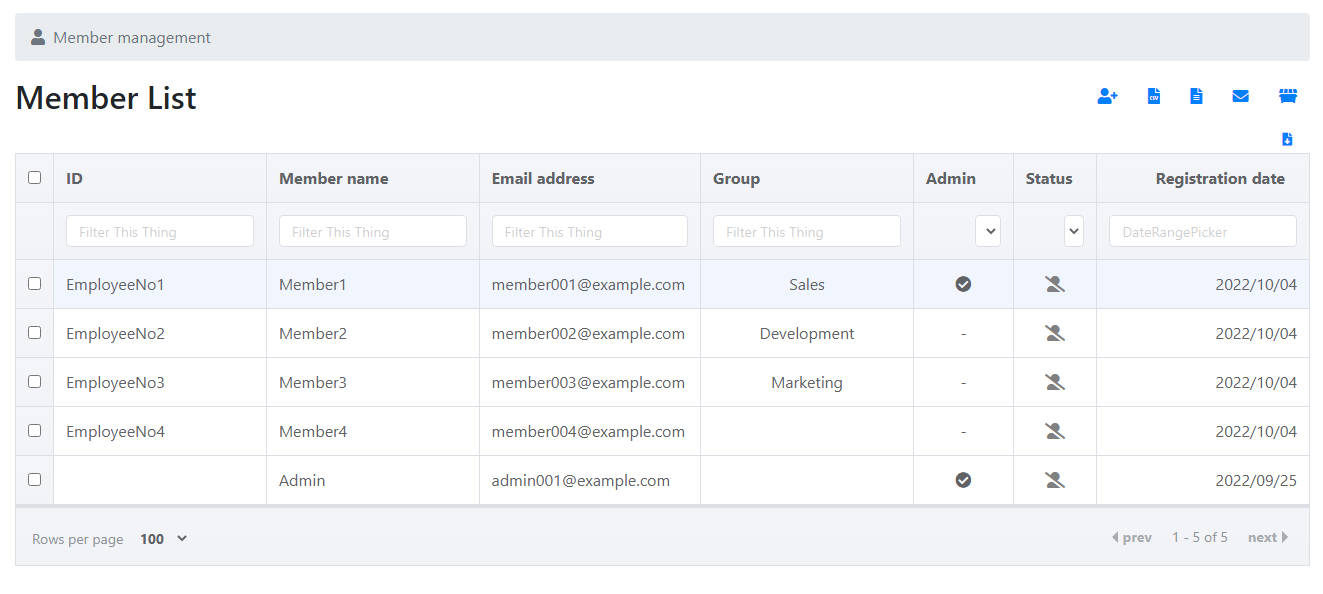
Click the “OK” button on the registration completion message.
When the members listed in the CSV file are displayed in the member list, the batch registration is complete.
In case of a registration error
If there is a mistake in the CSV, a warning icon will appear on the confirmation screen. Hover over the warning icon to see the error content.
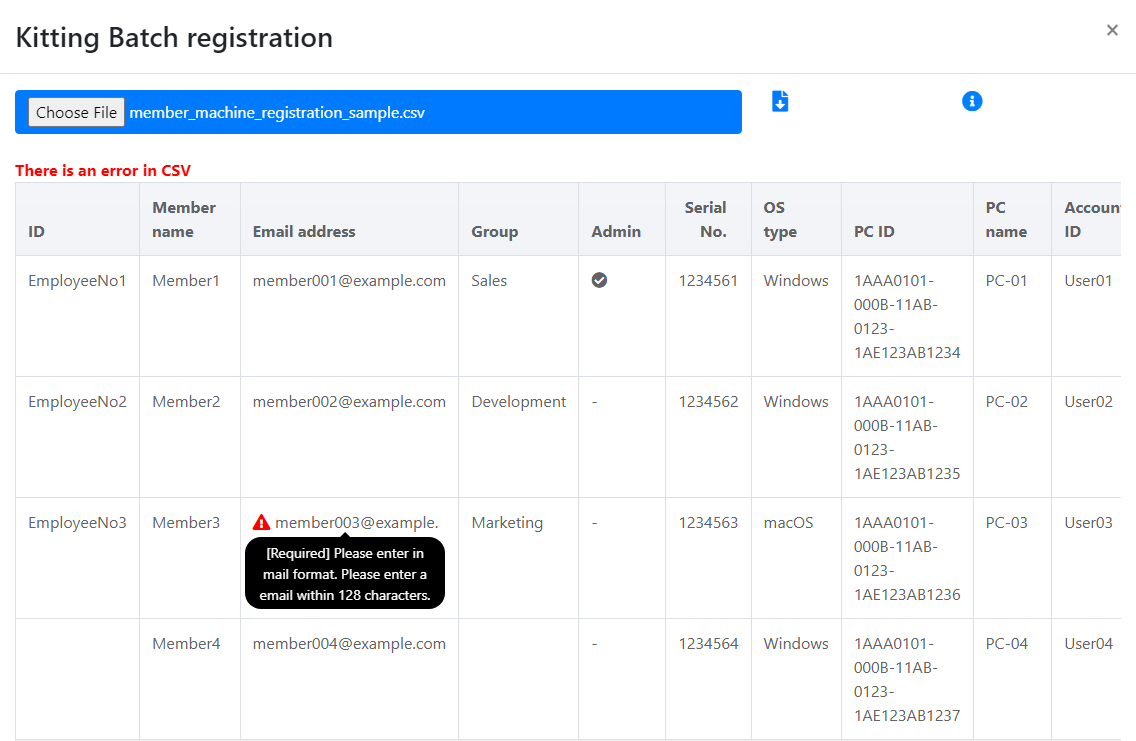
Please correct and re-register the CSV file as instructed.
Modifying content immediately after the completion of batch registration
Refer to the “Bulk deletion method” to perform batch deletion of incorrect data while registering only the correct data from the CSV file.
Go to Download mac login software.