Group policy settings
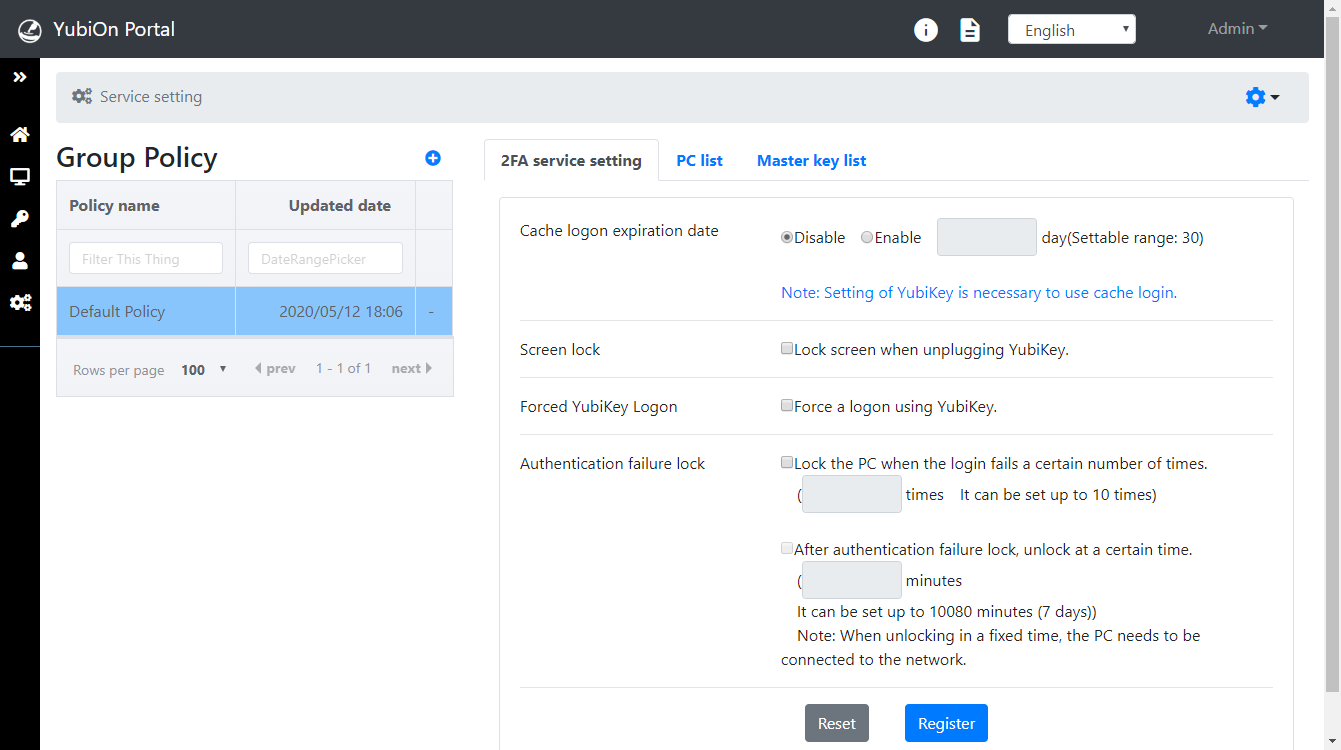
The function to configure multiple two-factor authentication service settings is called “group policy”. To reflect the group policy settings, you need to create a group, assign PCs, and set service items.

For details regarding the service settings, click here.
・By default, all PCs are assigned to “Default Policy”. When you add a new PC, it will be assigned to “Default Policy”.
・The “Default Policy” cannot be deleted.
Reflection of settings on the PC
The settings are reflected when the PC is started up while connected to the network.
Access Service setting
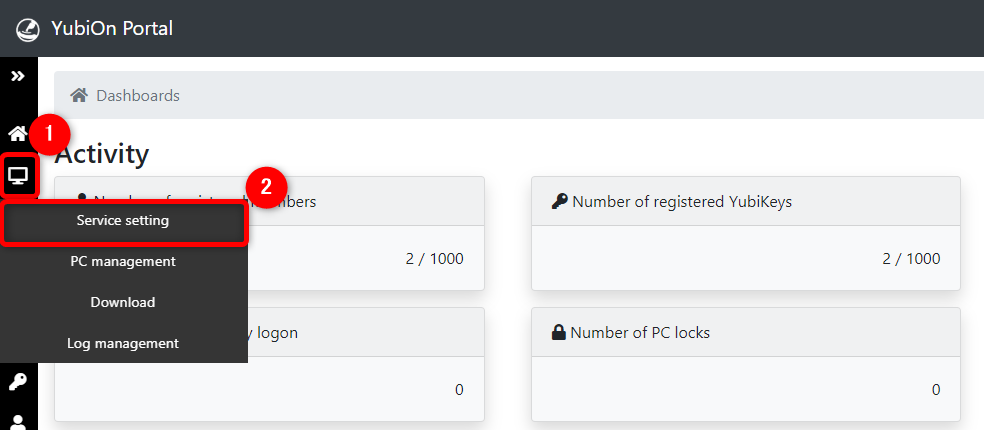
Click the “PCs” icon in the menu on the left side of the screen, and then click “Service setting”.

Add the group policy
Click the “+” button on the right side of the group policy list.

Enter the policy name and click on the “Register” button.

Click “OK” on the confirmation message.
This concludes the registering of a group policy.
In the newly created group policy, all items are set to the disabled.
Assigning a PC to a group policy
Click on the policy name from the group policy list.

Click the “PC list” tab.

Click the “+” button on the right side of the PC list.

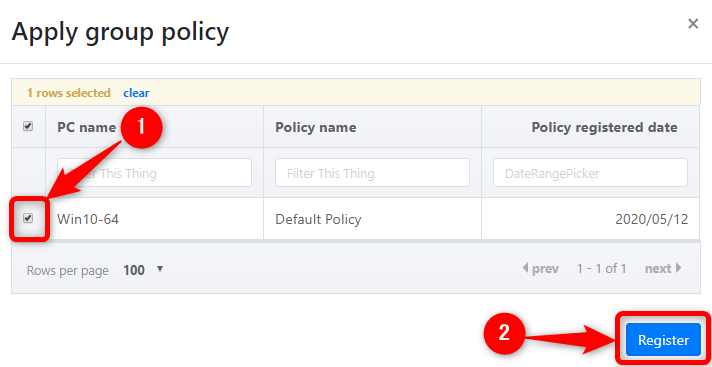
Select the PCs (multiple selections can be made), and click on the “Register” button.

Click “OK” on the confirmation message.
This concludes the PC assignment.
A PC can only be assigned to a single group.
Edit the group policy name
Click the “Edit” button to the right of the policy name in the group policy list.

Change the name of the group and click the “Update” button.

Click “OK” on the confirmation message.
This concludes changing of the group policy name.
Delete the group policy
Click the “Delete” button to the right of the policy name in the Group Policy List.

Click “OK” on the confirmation message.
After deleting the group policy, the PCs assigned to the deleted policy will be reassigned to the “Default Policy”.
This concludes the deletion of the group policies.
Confirmation of reflection of the group policy
Group policy reflection status
- Reflected: The latest group policy is reflected on the PC.
- Unreflected: The group policy has not been reflected on the PC.
- Old policy is reflected: The old group policy is reflected on the PC.
-
Click on the group policy you wish to review.

-
Click on the "PC list" tab.

-
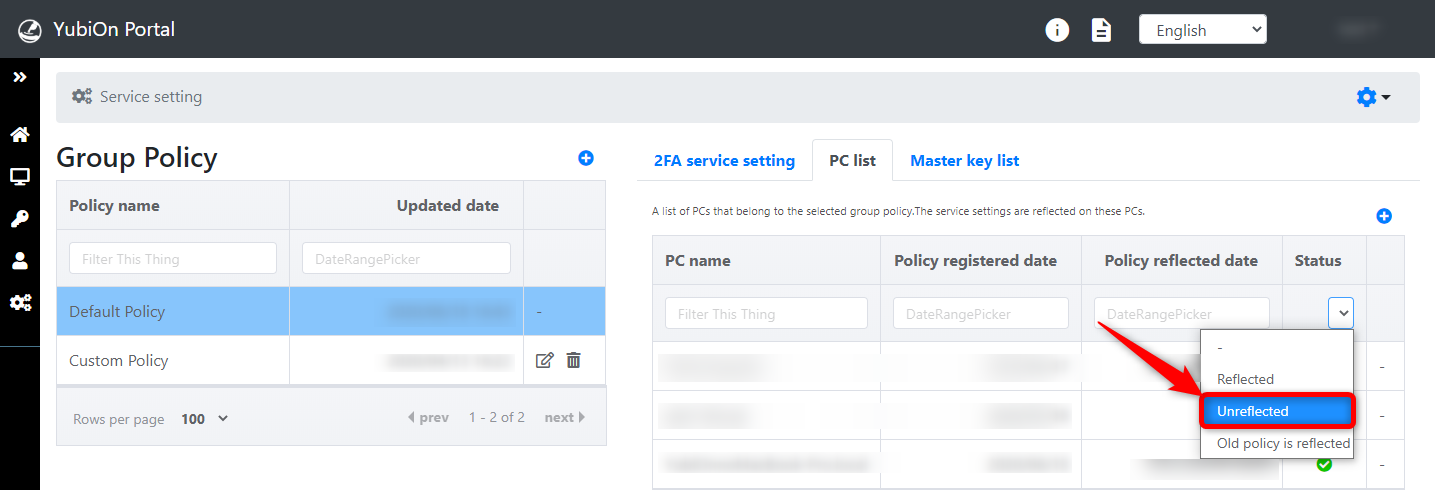
Click on the pull-down under "Status."
Next, click on "Unreflected.
-
A list of PCs to which the group policy has not yet been applied is displayed.
 The "Unreflected" status is indicated by an "X" mark.
Info
-
To check "Old policy is reflected" status
Clicking "Old policy is reflected" in the "Status" pull-down displays a list of PCs that reflect the old group policy.
- If an old policy is reflected, it is indicated by a "warning mark".
- When a group policy is changed or another group policy is applied, the "old policy is reflected" status is set.
-
To check the "Reflected" status
Clicking "Reflected" in the "Status" pull-down displays a list of PCs with the latest group policy reflected.
- If the latest group policy is reflected, it is indicated by a "check" mark.
-
How to reflect the settings on your PC
The Group Policy setting is reflected when the target PC is connected to the network and logs on.